Thursday, February 21, 2013

A Mans Shirt Makes for Some Sexy Photos


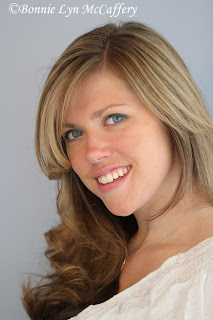
I'm always trying to practice taking photos. It sounds funny, but it really does take practice. Thats how I'm learning lighting, posing and the camera buttons. Abby has been happy to let me practice with her but she was a little worried that my facebook friends were getting tired of seeing her. So I bribed her...babysitting for posing. Now she's more than eager. I'm dipping my toe into the glamour and Boudoir (classy Boudoir that is). So Abby suggested a men's shirt and wow did we have fun.


There's absolutely nothing showing, but allowing the collar bone and shoulder to just peek out makes this sexy. A little more shoulder leads the imagination.


- 1 Photo a Day....makes me happy (and a better photographer) Bonnie McCaffery (always a student)

Friday, February 15, 2013

Enter the Forest of Dreams

"I am a portrait photographer"...she says with an air confidence. And so I shall be. Last August I got to practice some portrait photography with my friend Melinda. She is a stunning woman to begin with so it was up to me to just get the light right, the camera settings right, the right f-stop, the right moment. Yup, you just gotta try and do everything right.


Melinda Schwakhofer made this fantastic bed and quilt called Enter the Forest of Dreams. We took it out into the forest and were able to capture some photos of it. And then we played a bit.


I'll be seeing her again next week and I just can't wait to take more photos of her... - 1 Photo a Day....makes me happy (and a better photographer) Bonnie McCaffery (always a student)

Location:UK

Wednesday, July 11, 2012

Macro Light Play with Queen Anne's Lace

I love seeing Queen Anne's Lace come into bloom. I decided to pick a couple stems in various stages of life - closed buds, just opening, open all the way, and beginning to turn to seed. They were placed in a vase (just to hold them upright) in front of a plant outside - I wanted to achieve the natural outdoor setting. The challenge with this is that the slightest breeze moves the flower resulting in a blurred shot. And my back was killing me from bending over.

1.5 s at f/5.6
So the vase was brought inside. That would eliminate any breeze-movement and I could set the exposure time as long as I wanted. By being able to have a long exposure time, I could also use whatever f-stop I wanted. The comfort of sitting in a chair was just a bonus.

It was completely by accident that I got the lovely colors in the background. It was the brown table cloth and the TV showing in the background.
1.5 s at f/5.6 - TV in the background

By moving the flower so it was in front of the window instead, this pretty blue background happened.

2.0 s at f/6.7 - window in the background
The real magic happened when I brought out the flashlight. The shutter speed was left open for quite a long period of time and the flashlight was used to light the flower. The background is darker because it isn't being lit by the flashlight. The flashlight can be used a couple different ways:

1 - Keep the flashlight in one spot focused on one flower for the entire exposure. This results in a spotlit flower with the other flowers left in shadow.
Spotlight without movement
(same window in the background)
2 - Move the flashlight around during the exposure time. This paints light on everything it touches. 

1/8 s at f/9.5 Paint the flowers with the light
During my play the 250D Close-up Lens was added so I could get even closer to the flowers.
I'm finding that the most important things for successful Macro photos are:
1 - Perfect stillness. Use a tripod. Use a Remote Shutter Release so you finger doesn't move the camera when the button is pushed. Make sure there is not breeze or someone walking thru the room. And keep Jake (my sweet cat) OFF THE TABLE :)
2 - Use the zoom focus to get the best focus possible. When taking photos that close, the depth of field (or the space where things are focused) gets even smaller.

Lesson - An ordinary flashlight can be used to add light to a non-moving subject. This allows for longer shutter speeds and smaller f-stops.

- 1 Photo a Day....makes me happy (and a better photographer) Bonnie McCaffery (always a student)
Here's links to the equipment I used.


Wednesday, July 4, 2012

Me, My Honey, and My Tripod

The Little Shohola
I was running the day before and saw the beautiful morning light near our local stream and I wanted to go take photos the next morning. I love being with my husband so since he was home that morning I didn't want to loose our morning time together. I suggested we go to the stream. He could fish and I could take photos.
My honey fishing
The morning light was gorgeous and we were lucky enough to catch several Cedar Waxwings flying about. I have learned that my tripod is essential for a good clear shot. So I planted the tripod with the camera firmly attached. Everytime the Waxwings perched, I would try and swing the tripod head into place - and off they'd fly. I kept missing the shot. My Canon 70-200 f4.0L IS zoomed to 200mm doesn't leave much space to miss. Don't get me wrong, it is a super lens and I love it. But zoomed in like that, you gotta be pretty much on target.
Where the Cedar Waxwing had been...
only I wasn't quick enough. Next time.

I did finally get one, but wished I was closer.
This is very cropped...Next Time
So here is what I figured out... loosen everything up so the tripod head is free to move EASILY. This way when the Waxwing was perched, I could quickly swing the camera into position.  The left photo is the branch where the Waxwing had been and I missed it (it would have been an awesome setting). The below right photo is a very cropped version of my best shot of the Waxwing for the morning. I plan on going back and getting that perfect shot - I know where to stand now and how to set up my tripod...

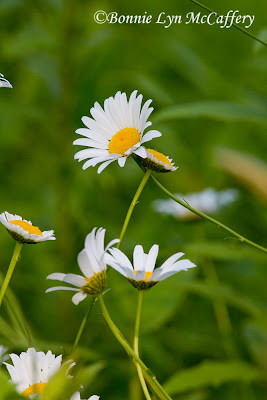
One shot of daisies I did get that I like.
Lesson - Loosen up the tripod head for fast tracking while trying to take bird photos.

- 1 Photo a Day....makes me happy (and a better photographer) Bonnie McCaffery (always a student)
Here's links to the equipment I used.

Wednesday, June 27, 2012

Monet a Photo - Playing with Nik Color Efex Pro 4


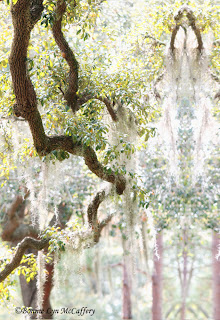
I took this beautiful photo of the hanging Spanish moss while I was in Florida. It's lovely and it sure looked like it would be fun to play with. I've been watching a lot of CreativeLive.com classes (which are free while they are live and an amazing source of photography information with incredible instructors). While watching they demoed some Nik Color Efex Pro 4 filters. I got to download a couple of these for free. The catch was that when I did that, it loaded Nik Color Efex Pro 4 to my computer for a limited time. The problem is not that they loaded, it's that now that I've played with them, I will want to own them. So let me show you what I've done.

I took this beautiful photo of the hanging Spanish moss while I was in Florida. It's lovely and it sure looked like it would be fun to play with.

Awhile back I had done some portrait photos for a friend of my daughters. I selected one of the photos and used the mask tool to remove her from the background. Then I was able to bring her in to the Spanish moss photo. But before I brought her in, I did a little manipulation with the Nik Color Efex Pro.


First I duplicated the Spanish moss photo. That later was mirrored and moved over. I wanted to see more of the branch to the left and I needed to fill the space to the right.
I used 2 of the Nik Color Efex Pro filters - Photo Stylizer and Sunlight.


Next I brought the masked version of my model into the working file. Then one more Nik Color Efex Pro filter...Classical Soft Focus...over the whole image. I reduce the transparency a little and a little sharpening to her face only and ooolaaalaa.

I am really enjoying this compositing stuff and the Nik Color Efex Pro 4. I'm in trouble now, ha, ha...


Lesson - Try out some add on software like Nik Color Efex Pro 4.

- 1 Photo a Day....makes me happy (and a better photographer) Bonnie McCaffery (always a student)
Here's links to the equipment I used.

Wednesday, June 20, 2012

Backgrounds & Photoshop Fun

I am learning so much lately... I especially love what I've been learning about Photoshop. I have CS5.5. The masking tool in this version of Photoshop is amazing. Rather than me trying to explain it, here is a link to a video that explains it quite well.
http://www.youtube.com/watch?v=iUUFIdAsj2o

So here's what I've done. I have a lovely picture of Abby on a plain blue wall and a macro photo of a rock I took at the Smithsonia Museum of Natural History.

Duplicate the Abby photo layer (Ctrl J). I brought the rock photo layer into the Abby photo and placed it below the Abby duplicate layer. Then I masked out the background of the Abby photo which revealed the rock photo below.

I did do several other adjustments to the Abby photo including removing a few blemishes, whiting the whites of her eyes, and altering the color of her irises to go with the color of the rock.
I played with this a little more with a great photo I had of Levi and a macro photo of Citrine. This time I changed the color of the rock photo (using a Hue/Saturation layer over the rock photo) to go with Levi's eyes.

Wednesday, June 13, 2012

Close, Closer, Closer...

Sometimes I just like to buy myself a bouquet of flowers - it's for homework, right?


I put on my favorite lens (my Canon 100mm f2.8L Is Macro) and my tripod which is critical if your going to take sharp closeup photos. I started with an average shot - it's pretty with the different colors of flowers. But then I went in a little closer....nice.
Then I popped a 250D Closeup Lens on my Macro lens...which meant I could get even closer. It's kinda like a magnifying glass for the camera lens.
And I just kept going...closer...and closer.
I shifted my lens ever so slightly to eliminate the center of the flower. Which do you think is the better shot?
Lesson - Buy yourself a homework assignment of flowers and play with some closeup shots.

- 1 Photo a Day....makes me happy (and a better photographer) Bonnie McCaffery (always a student)
Here's links to the equipment I used.